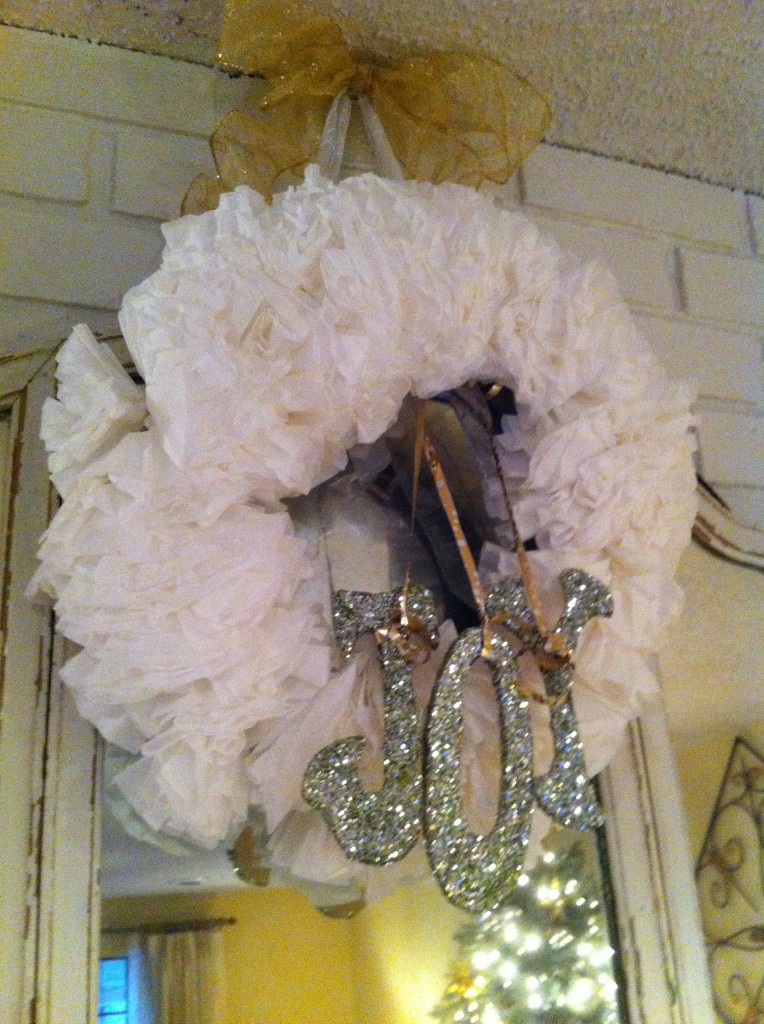
 As I was putting all of my Christmas decorations up last week, I hung my coffee filter wreath and remembered that I did a DIY post on how to make it last year for a Design Blog that I occasionally posted for- I found it and decided to re-publish it on my blog- Enjoy!
***********
If you read my previous post on my fire place make-over, you got a sneak peak at my project. While drooling over someone else’s house on their blog, I noticed a beautiful wreath hanging above her mantle. She didn’t directly talk about making it but when I continued to read she mentioned she used coffee filters extensively in that room so I put two and two together. I did a little research and found several different suggestions for making a coffee filter wreath but through some trial and error (and lots of hair pulling) I found the quickest and easiest way to do it.  Still, this may take a little time so wait until the kiddos are in bed and put on It’s A Wonderful Life or some other Christmas movie that makes the heart happy.
(click on any of the pictures to see greater detail)
Step 1: Get the supplies. A foam wreath, floral wire, wire cutters, glitter, *chipboard or wooden letters and ribbon are all things easily found at most craft stores like Hobby Lobby, Michael’s or JoAnn’s. I already had 100-200 coffee filters, but Wal-Mart has them in supply and also has a cool brown filter color option for the chocolate color lovers.
*preferred method (the wooden letters are HEAVY.)
Step 2: Grab a coffee filter and twist it at the bottom creating a little flower. (see above pic)
Step 3: Clip a wire section off and twist it around the bottom of 2-3 of the coffee filter flowers.
Step 4: At this point I would highly recommend using a craft glue or hot glue gun and put a little dab on the end before you stick the other end of the wire firmly into the foam wreath. I didn’t use glue and the filter twists kept falling out. (Grumble Grumble)
Step 5: Repeat steps 2-4, putting the flowers close together. (see above pic) I did a single line and it filled well. If you want a fuller wreath, do 2 lines, one a little on the inside of the foam circle and one towards the out side.
**********
Step 6: In a pan, smear glue all over the first letter then sprinkle liberally with glitter. Repeat with remaining letters. Let dry.
Step 7: Fill any bare spots on the wreath while waiting.
Step 8: If you used wooden letters- using ribbon, make little knots around the letters and while the wreath is hanging, experiment with where you want them to hang before securing the ribbon to the wreath. I tied mine around the wreath itself very careful not to knock off the filter flowers. Hot glue would work here as well. This part was frustrating for me, but I do love the finished product!
If you used chipboard letters, I’d just place some hot glue on the back of them and stick directly to the coffee filter flowers. They are extremely light-weight and will stick. You don’t need ribbon unless you just want to embellish a little.
Step 9: With a hot glue gun or craft glue, adhere ribbon at the length you want it to hang. With another ribbon, tie a big bow. Hang wreath up, then add the bow and fluff.
I got a lot of comments on this wreath! It stored well and although I had to re-stick some of the coffee filters, (because I didn’t use hot glue) it looks great!


